
Learn How To Make Springtime Origami Flowers
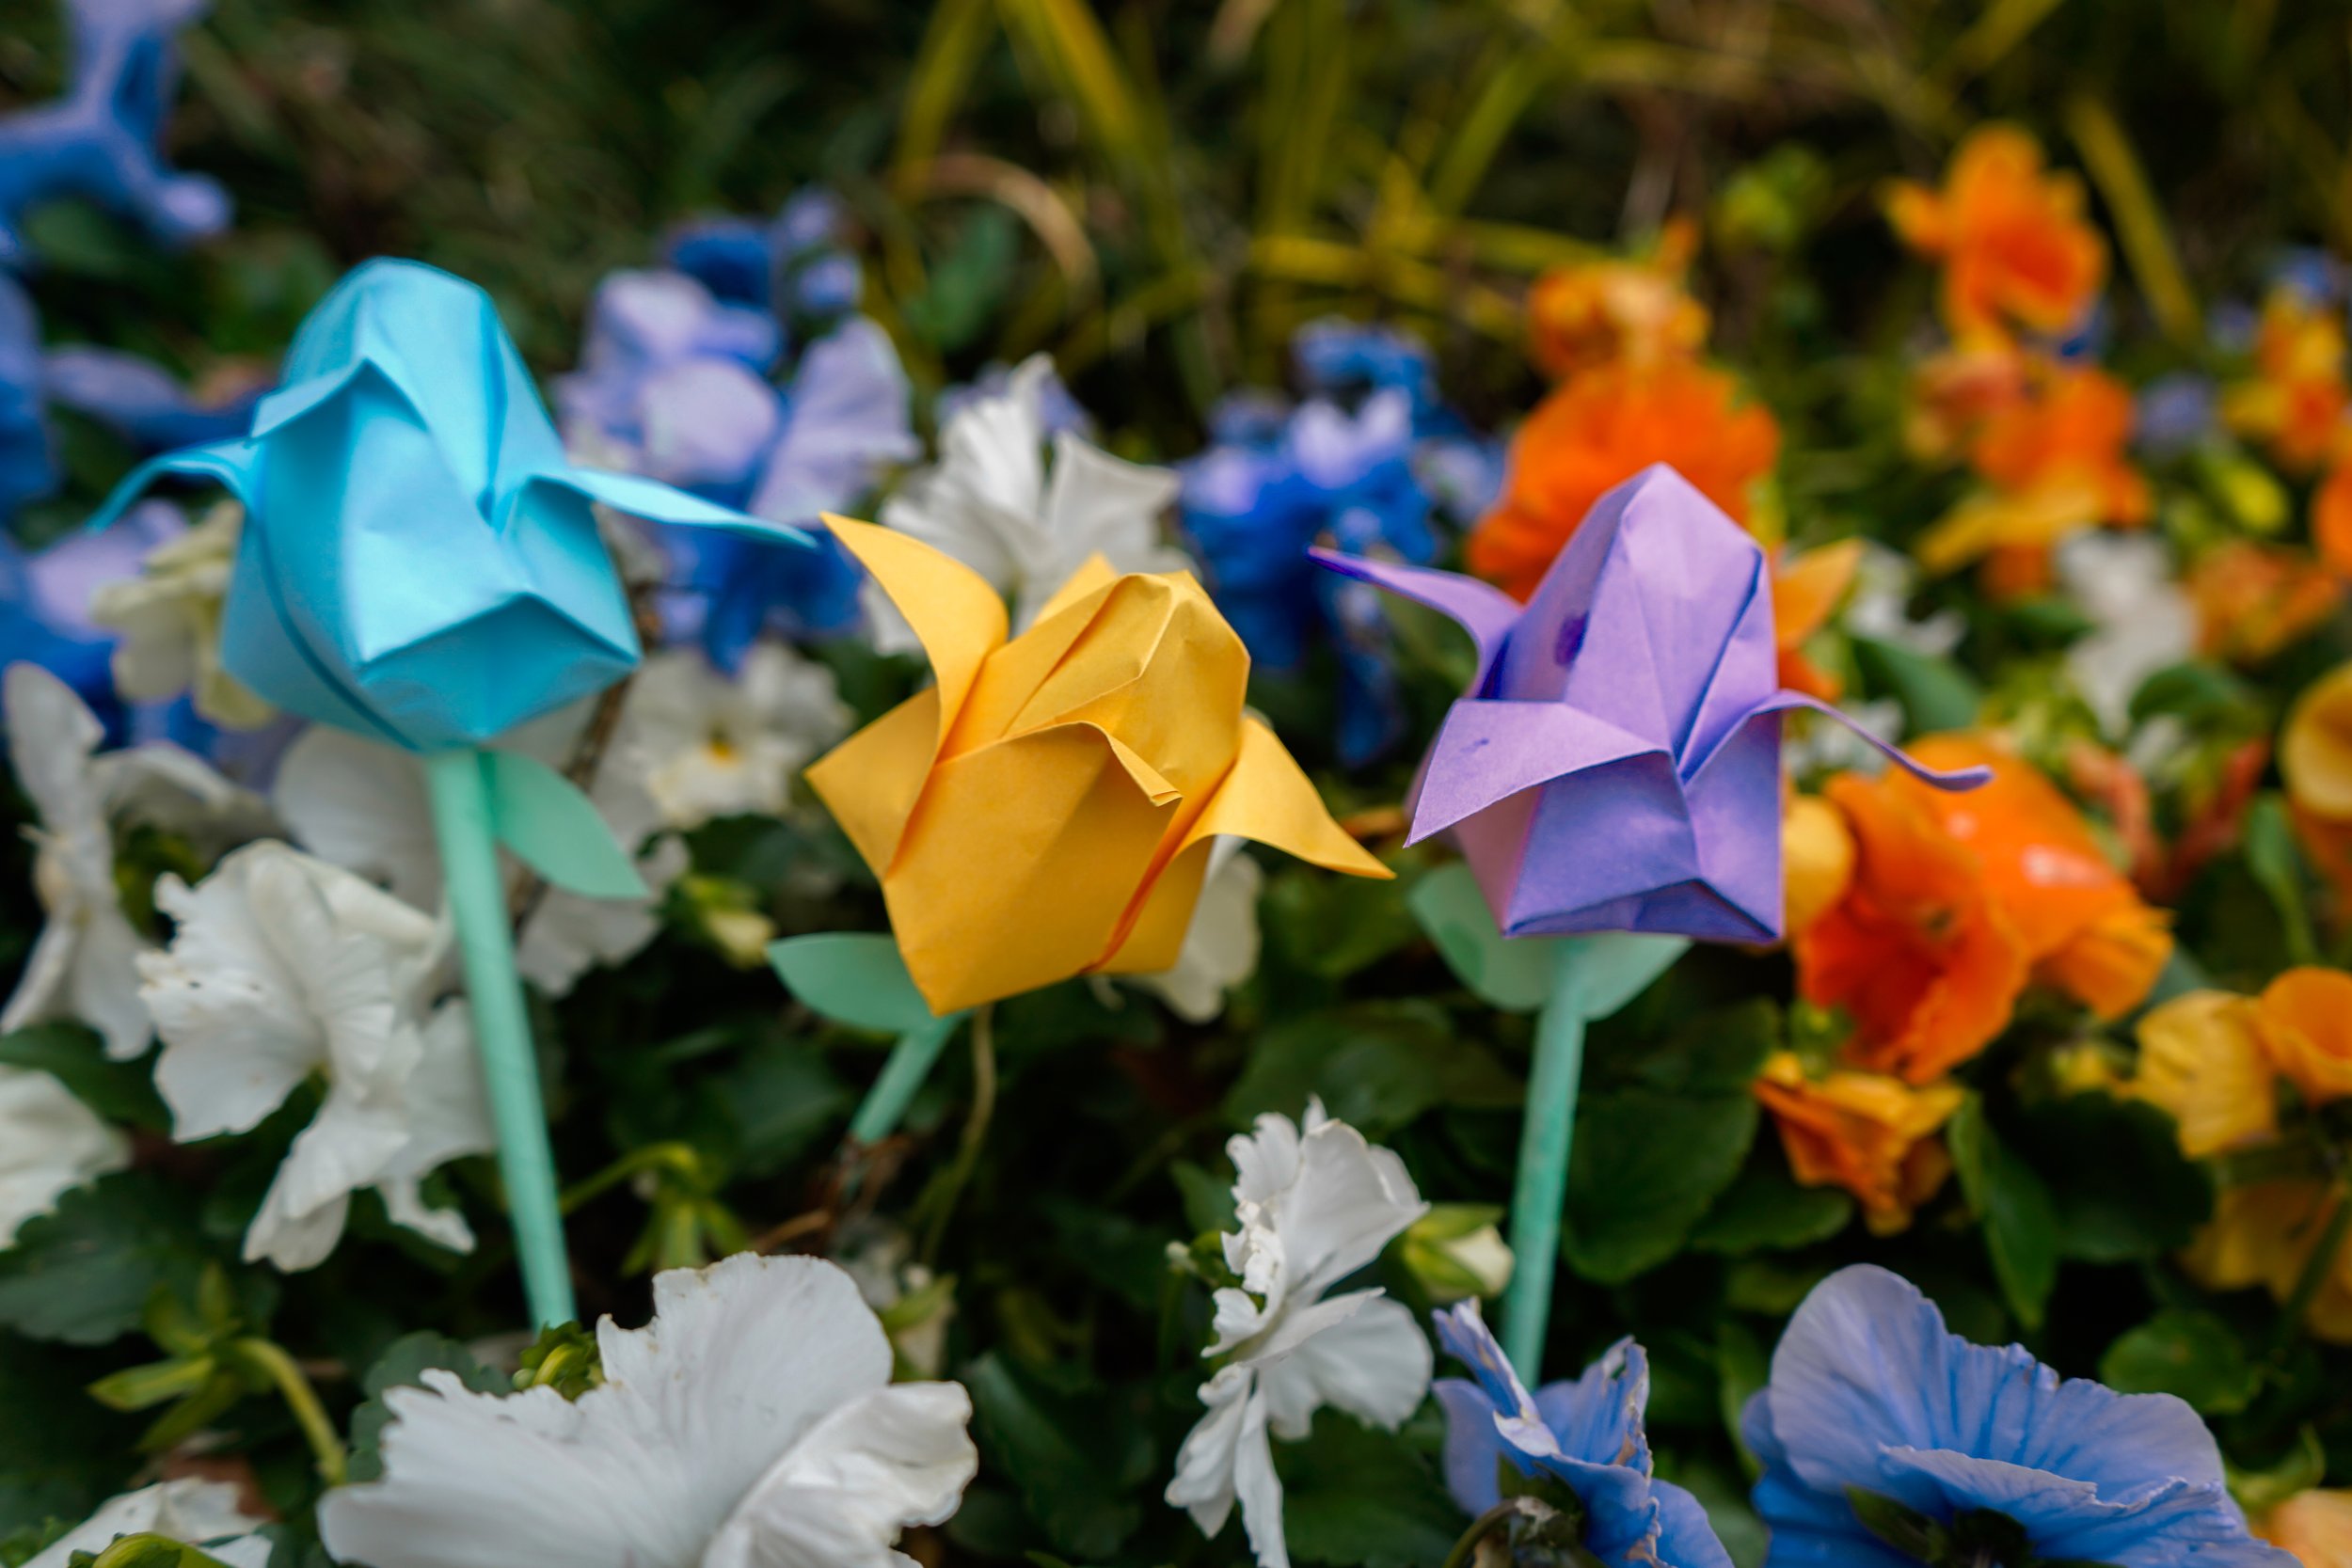
Welcome the spring with some springtime origami flowers!
Growing up, I loved making origami. The architect and artist in me was fascinated by seeing what once was a flat piece of paper take the form of a dragon, airplane, or anything else you could imagine. During school, I would always make the origami frogs that would jump when you press on its back and launch them across the room. So much so, that I would get in trouble. As I got older, I moved on from launching frogs at people and made pop-up cards for special occasions such as Mother’s Day.
In light of making gifts out of origami, today I’m going to teach you how to make a bouquet of origami flowers for that special someone or simply to serve as seasonal decorations!
You will need:
Colored Papers (Green and whatever color flower you would like)
Glue
Scissors
Ruler
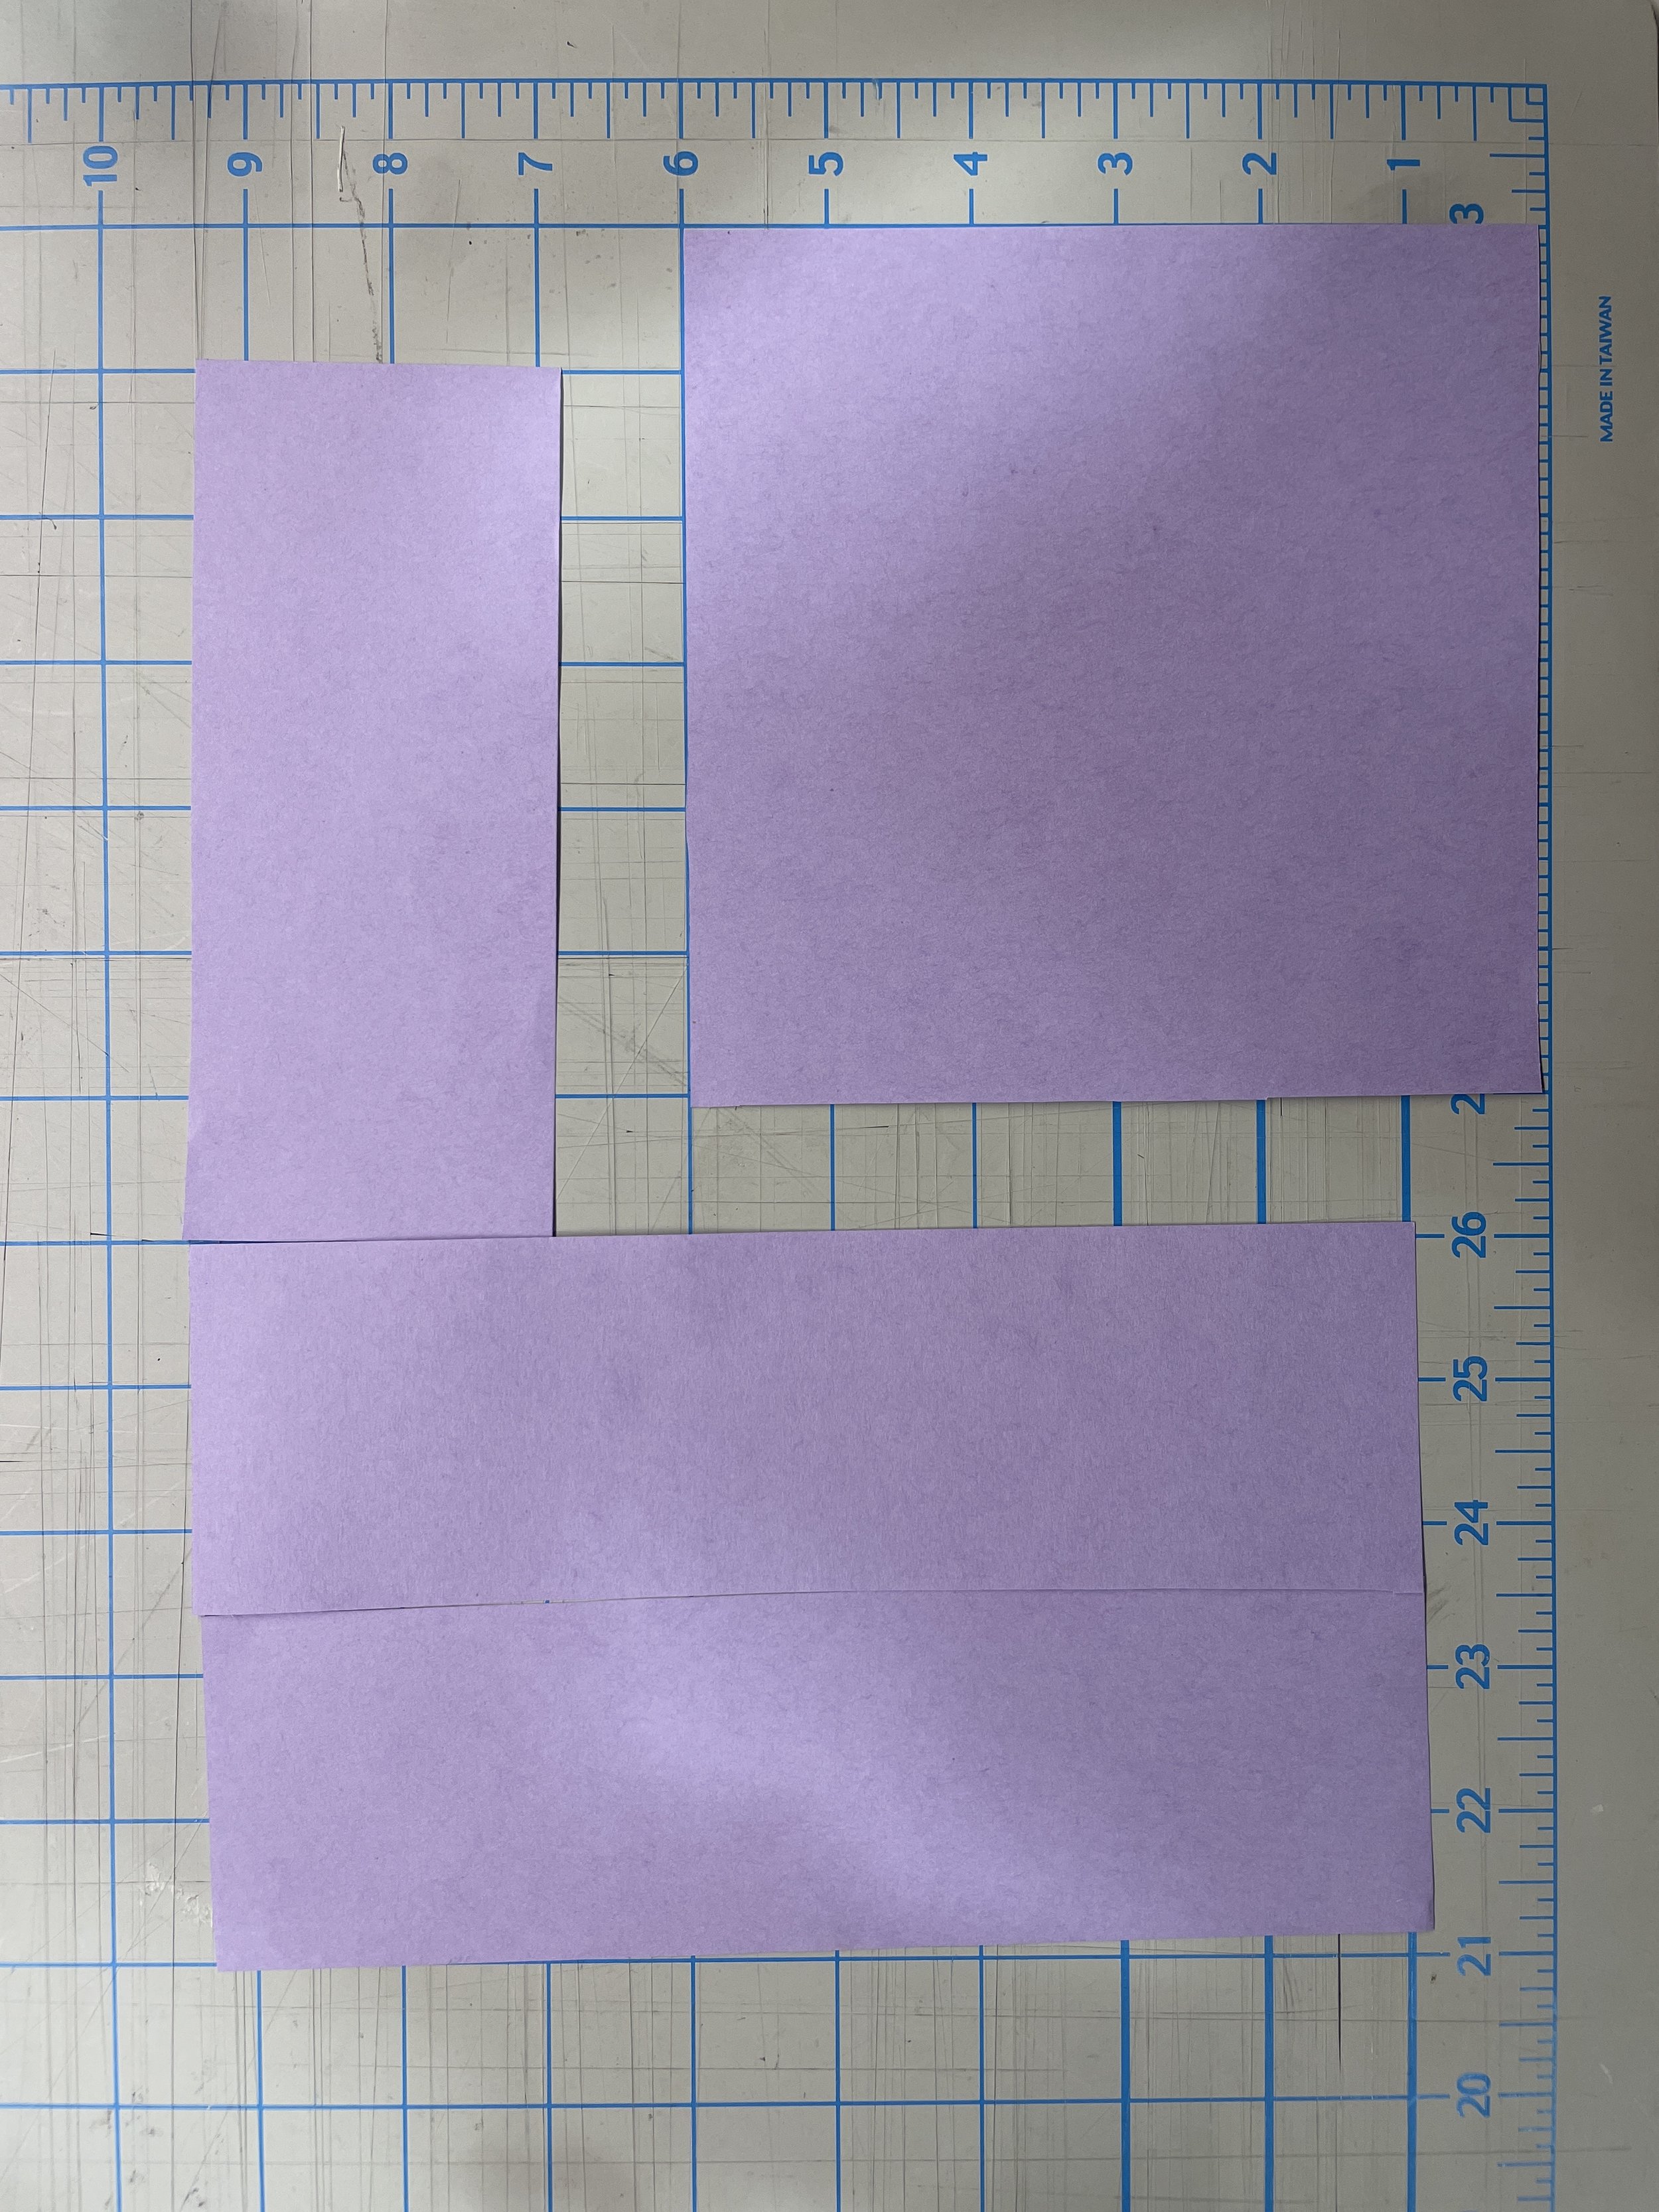
Step 1: Cut yourself a 6x6in square paper. Choose the color wisely because this will be the color of your flower.
Step 2: Fold the piece of paper horizontally. Then flip the paper over and fold it vertically. Then open the folds.

Step 3: Turn the paper to the shape of a diamond and fold horizontally and vertically again. Then open the folds.

Step 4: Push the right and left corners in as the paper takes the shape of a triangle.

Step 5: Take the bottom corners of the triangle and fold them to the top point of the triangle.
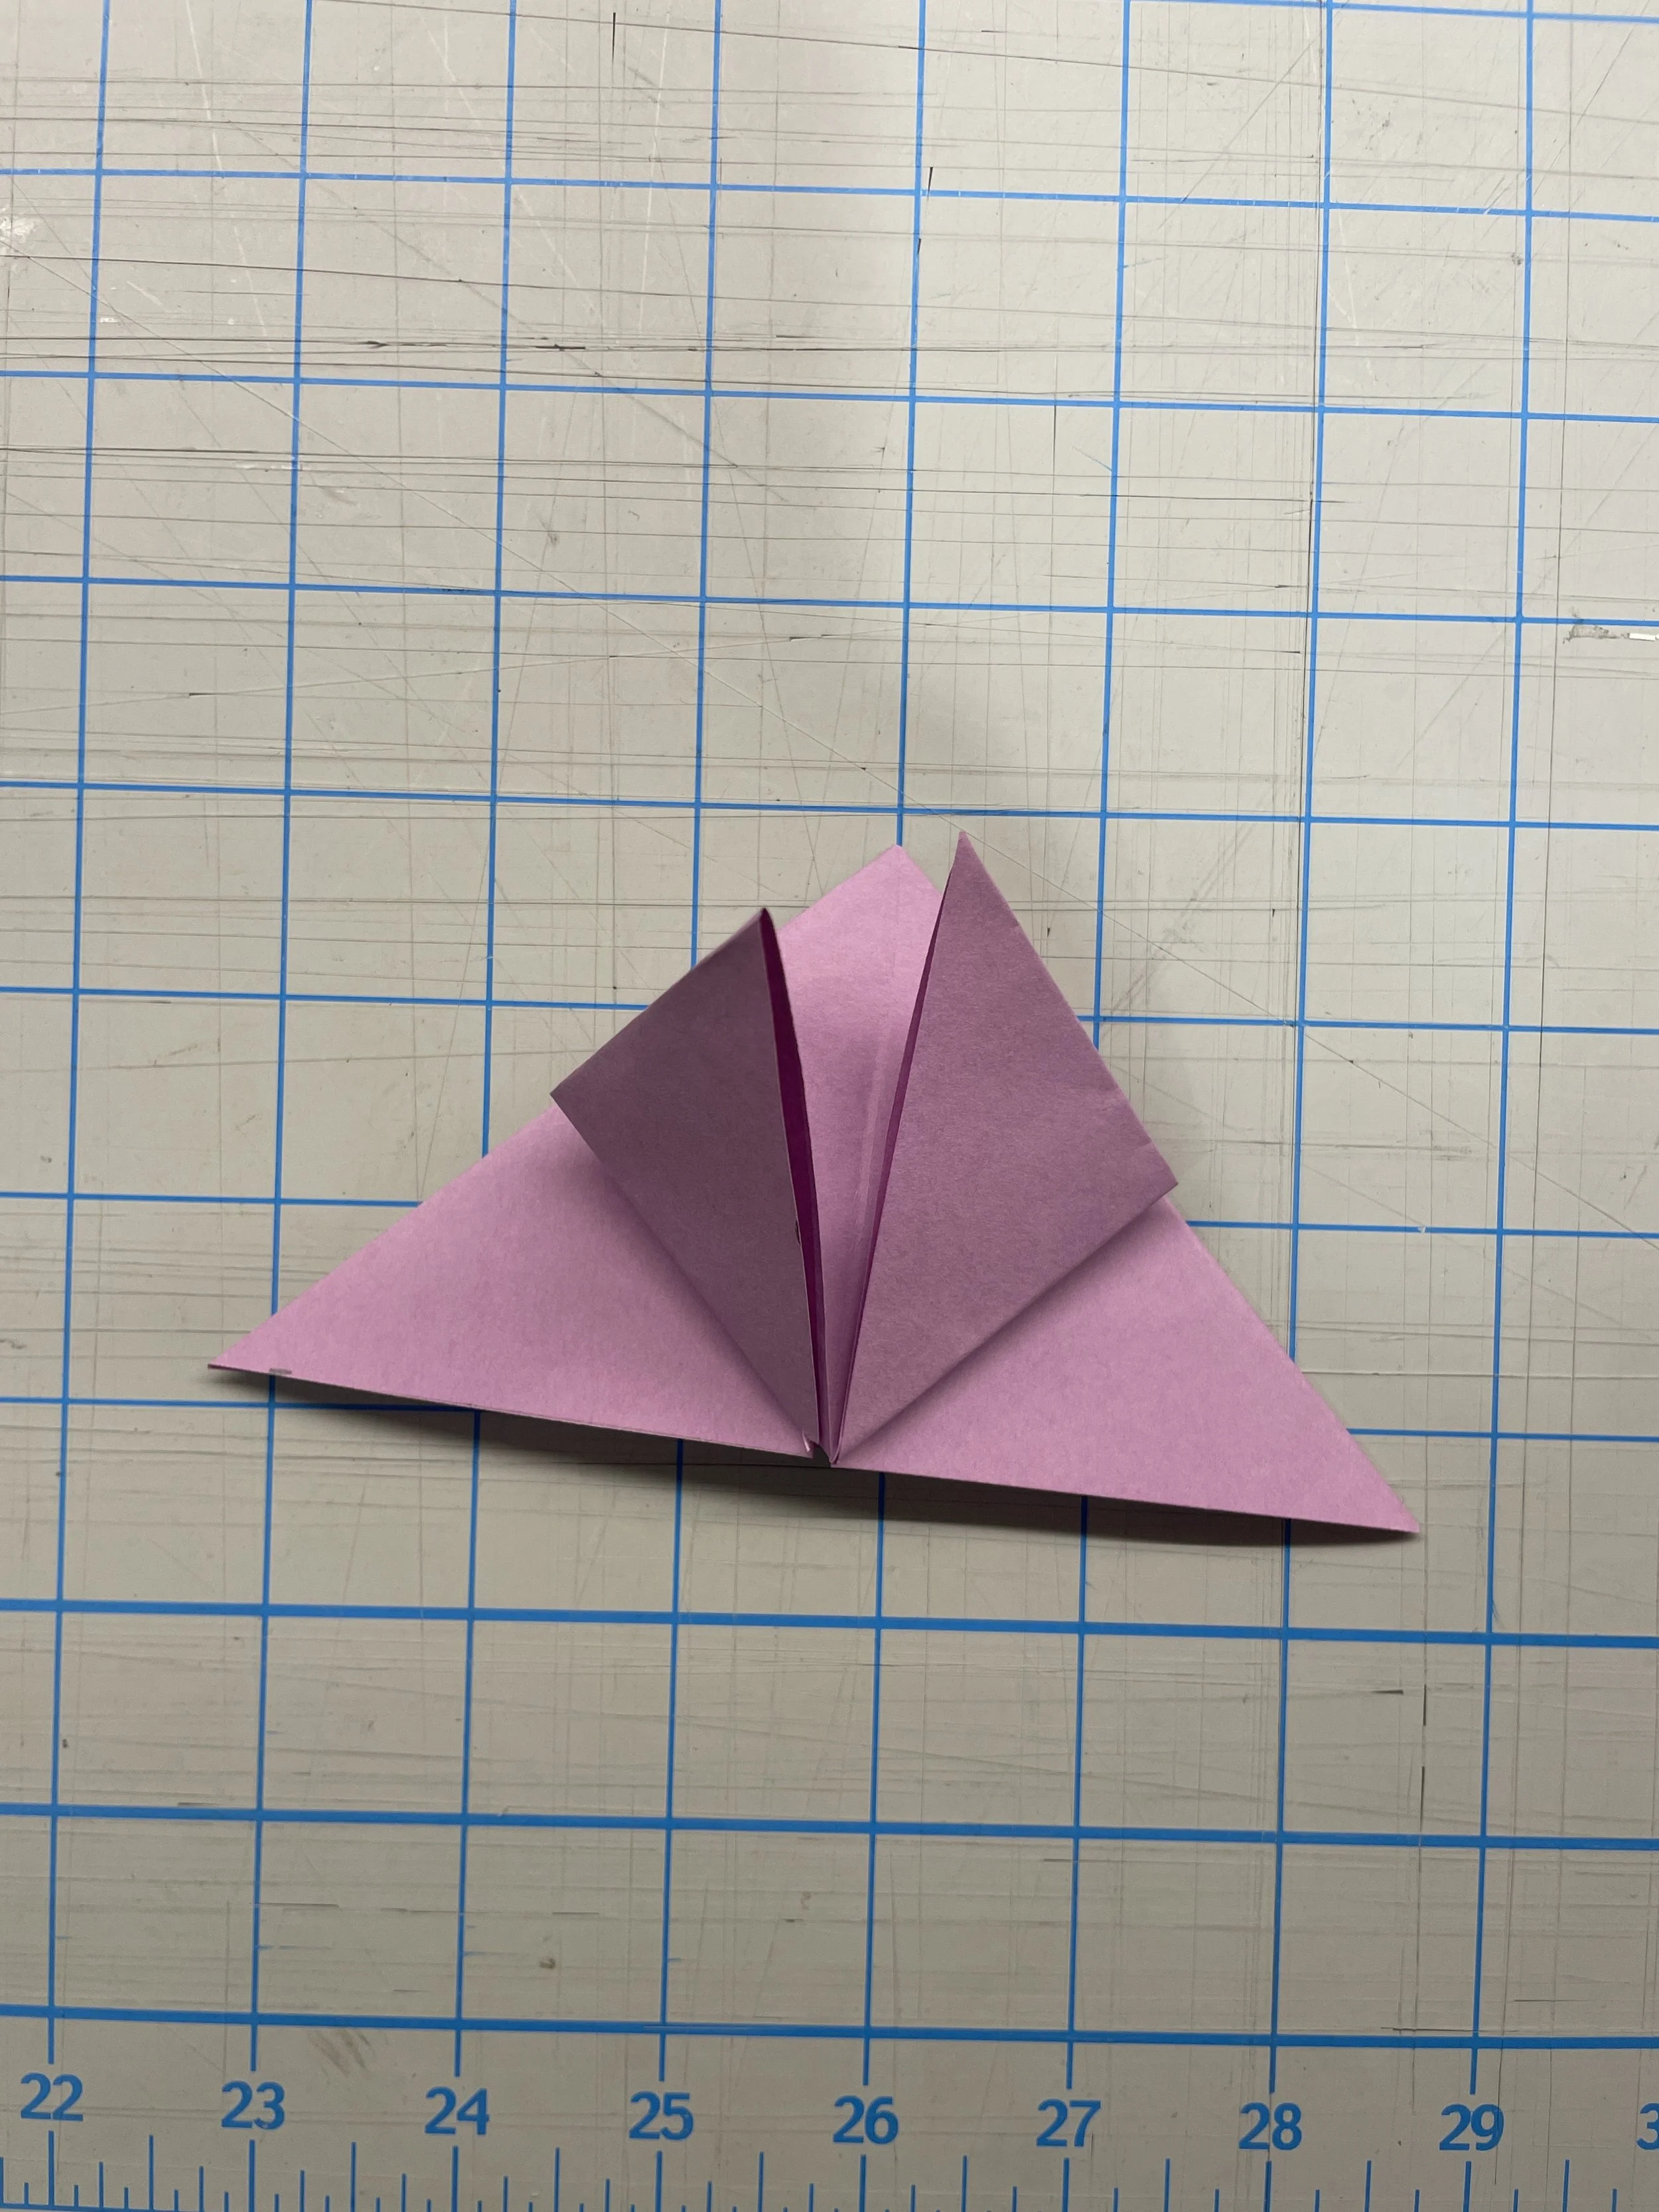
Step 6: Do the same to the other side.
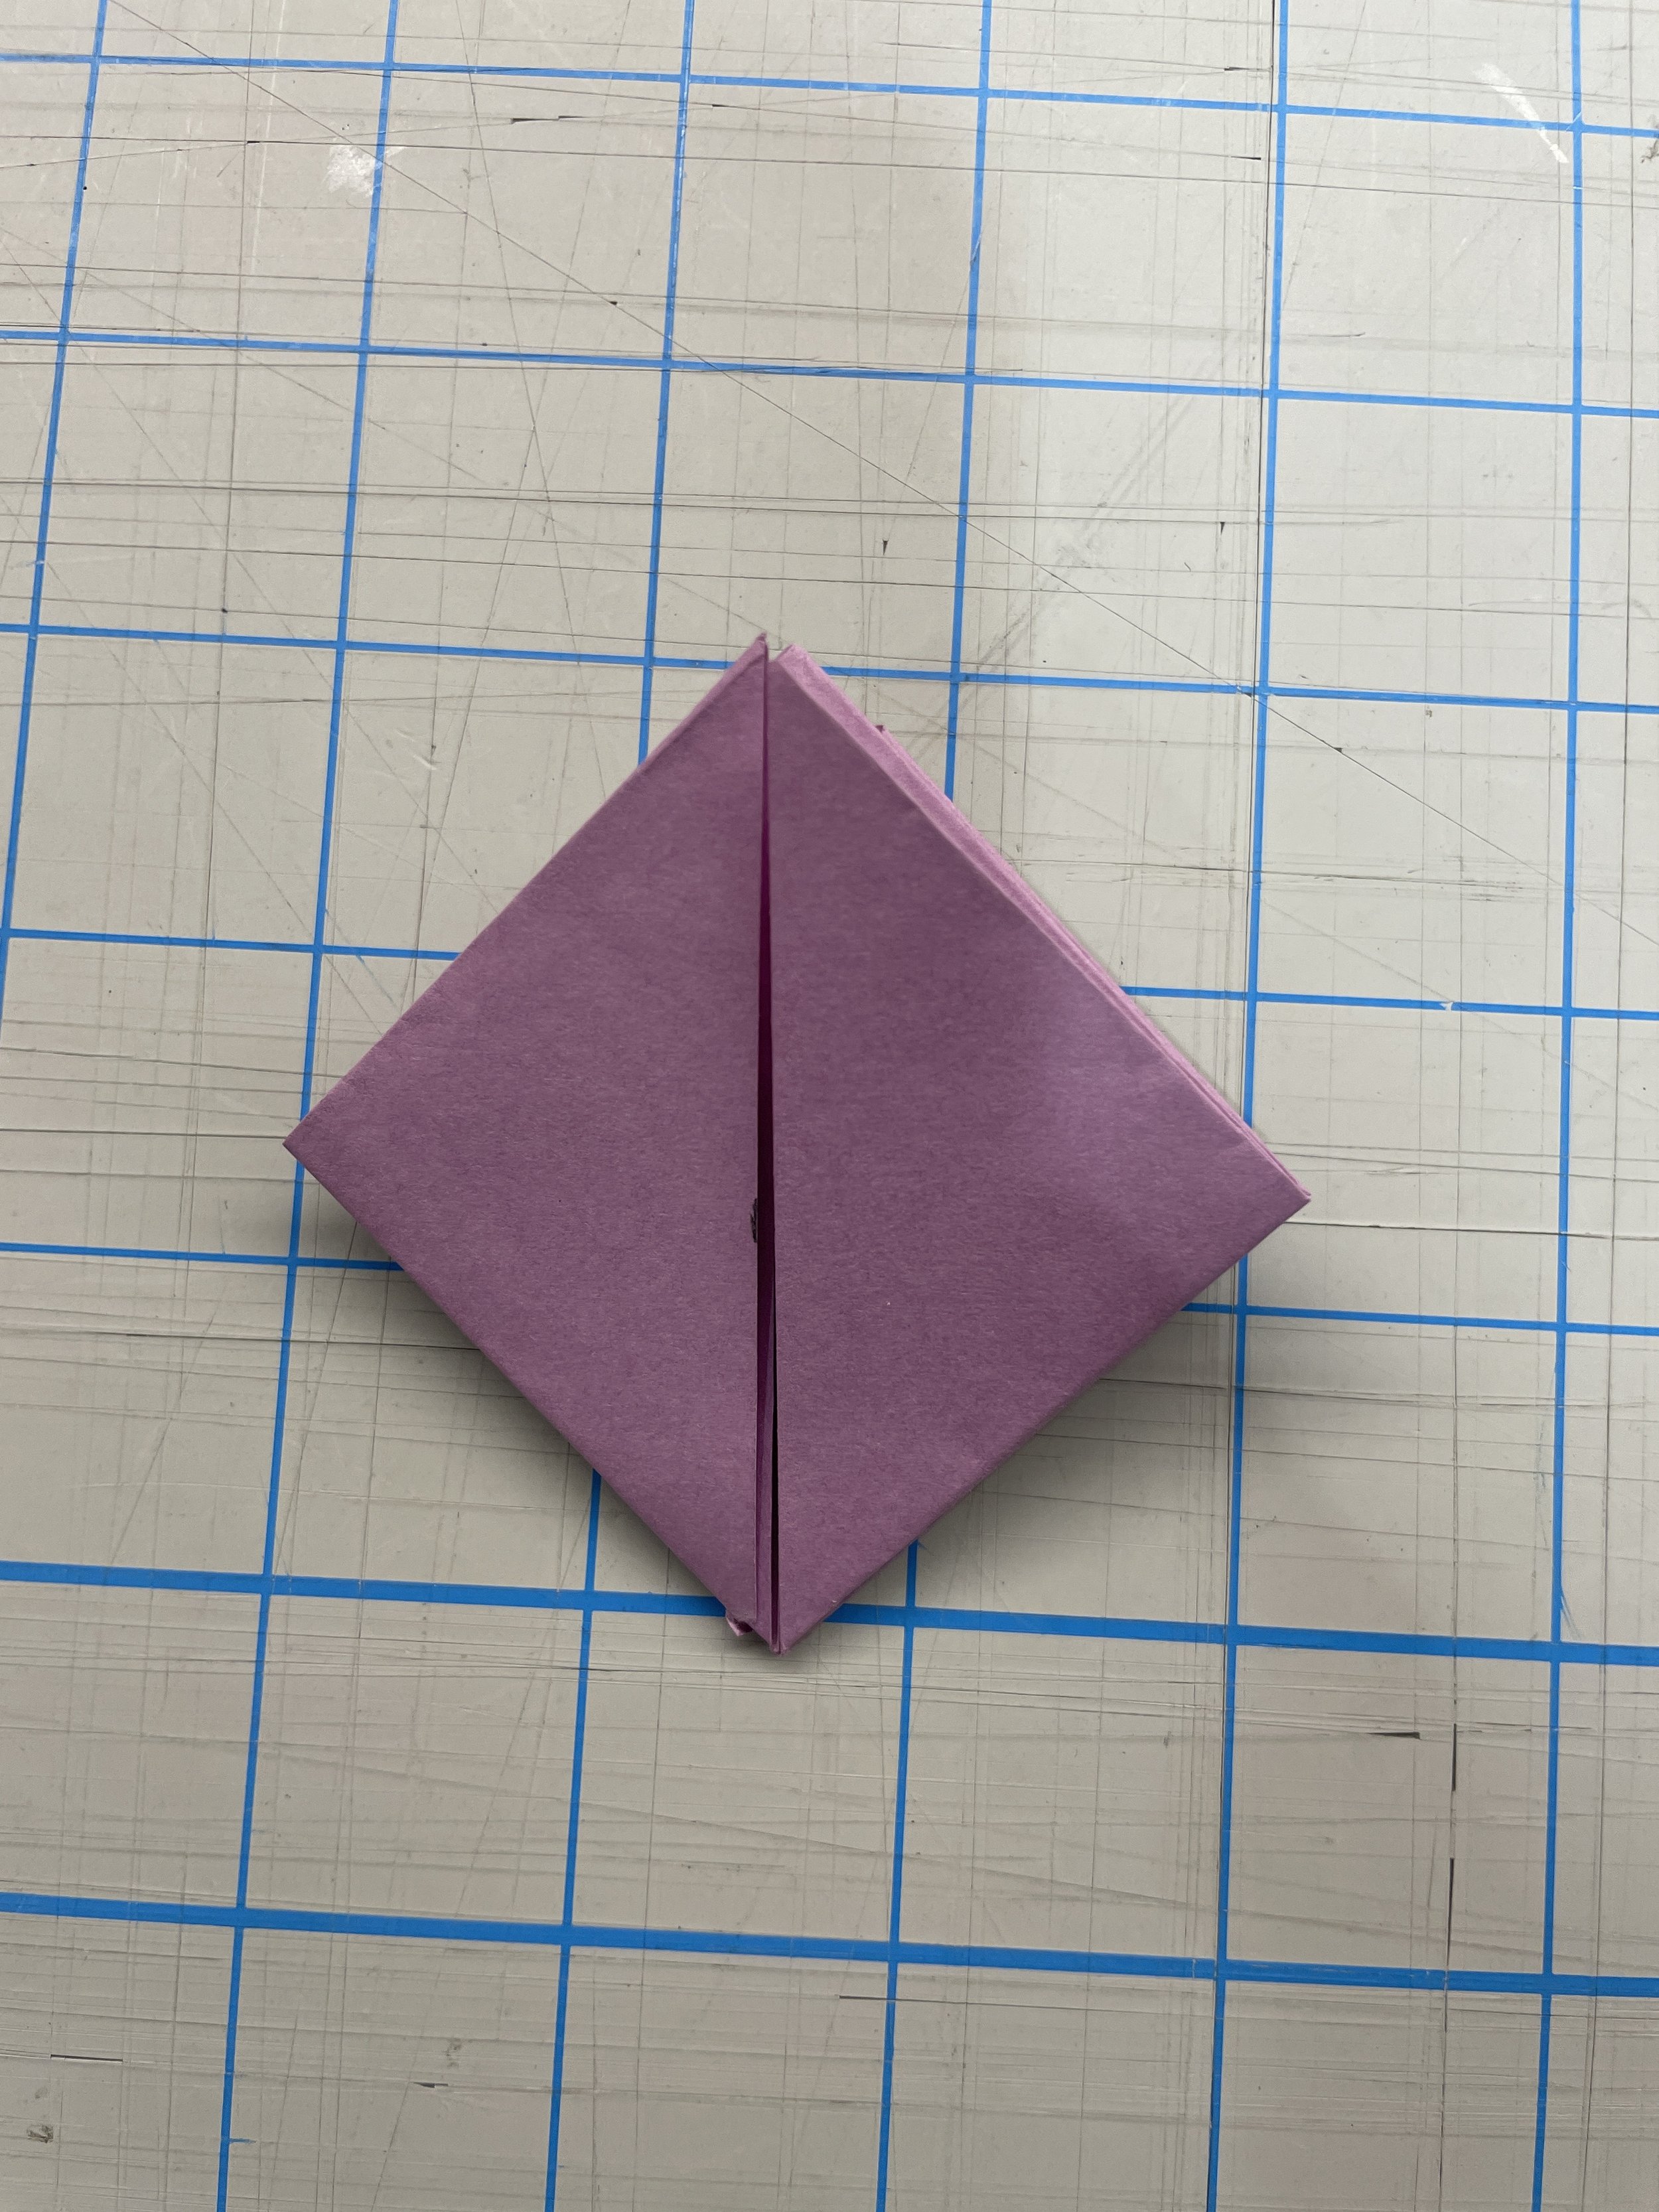
Step 7: Take the left side of the diamond shape and fold it to the right. Do the same to the other side. The diamond should now be smooth on both sides.

Step 8: Take the right corner of the diamond and fold it to the center of the diamond. Do the same to the left side. Place a dot of glue on one of the corners. Tuck the corner with the glue into the pocket of the other fold.

Step 9: Do the same to the other side, making sure to allow time for the other side to dry first.
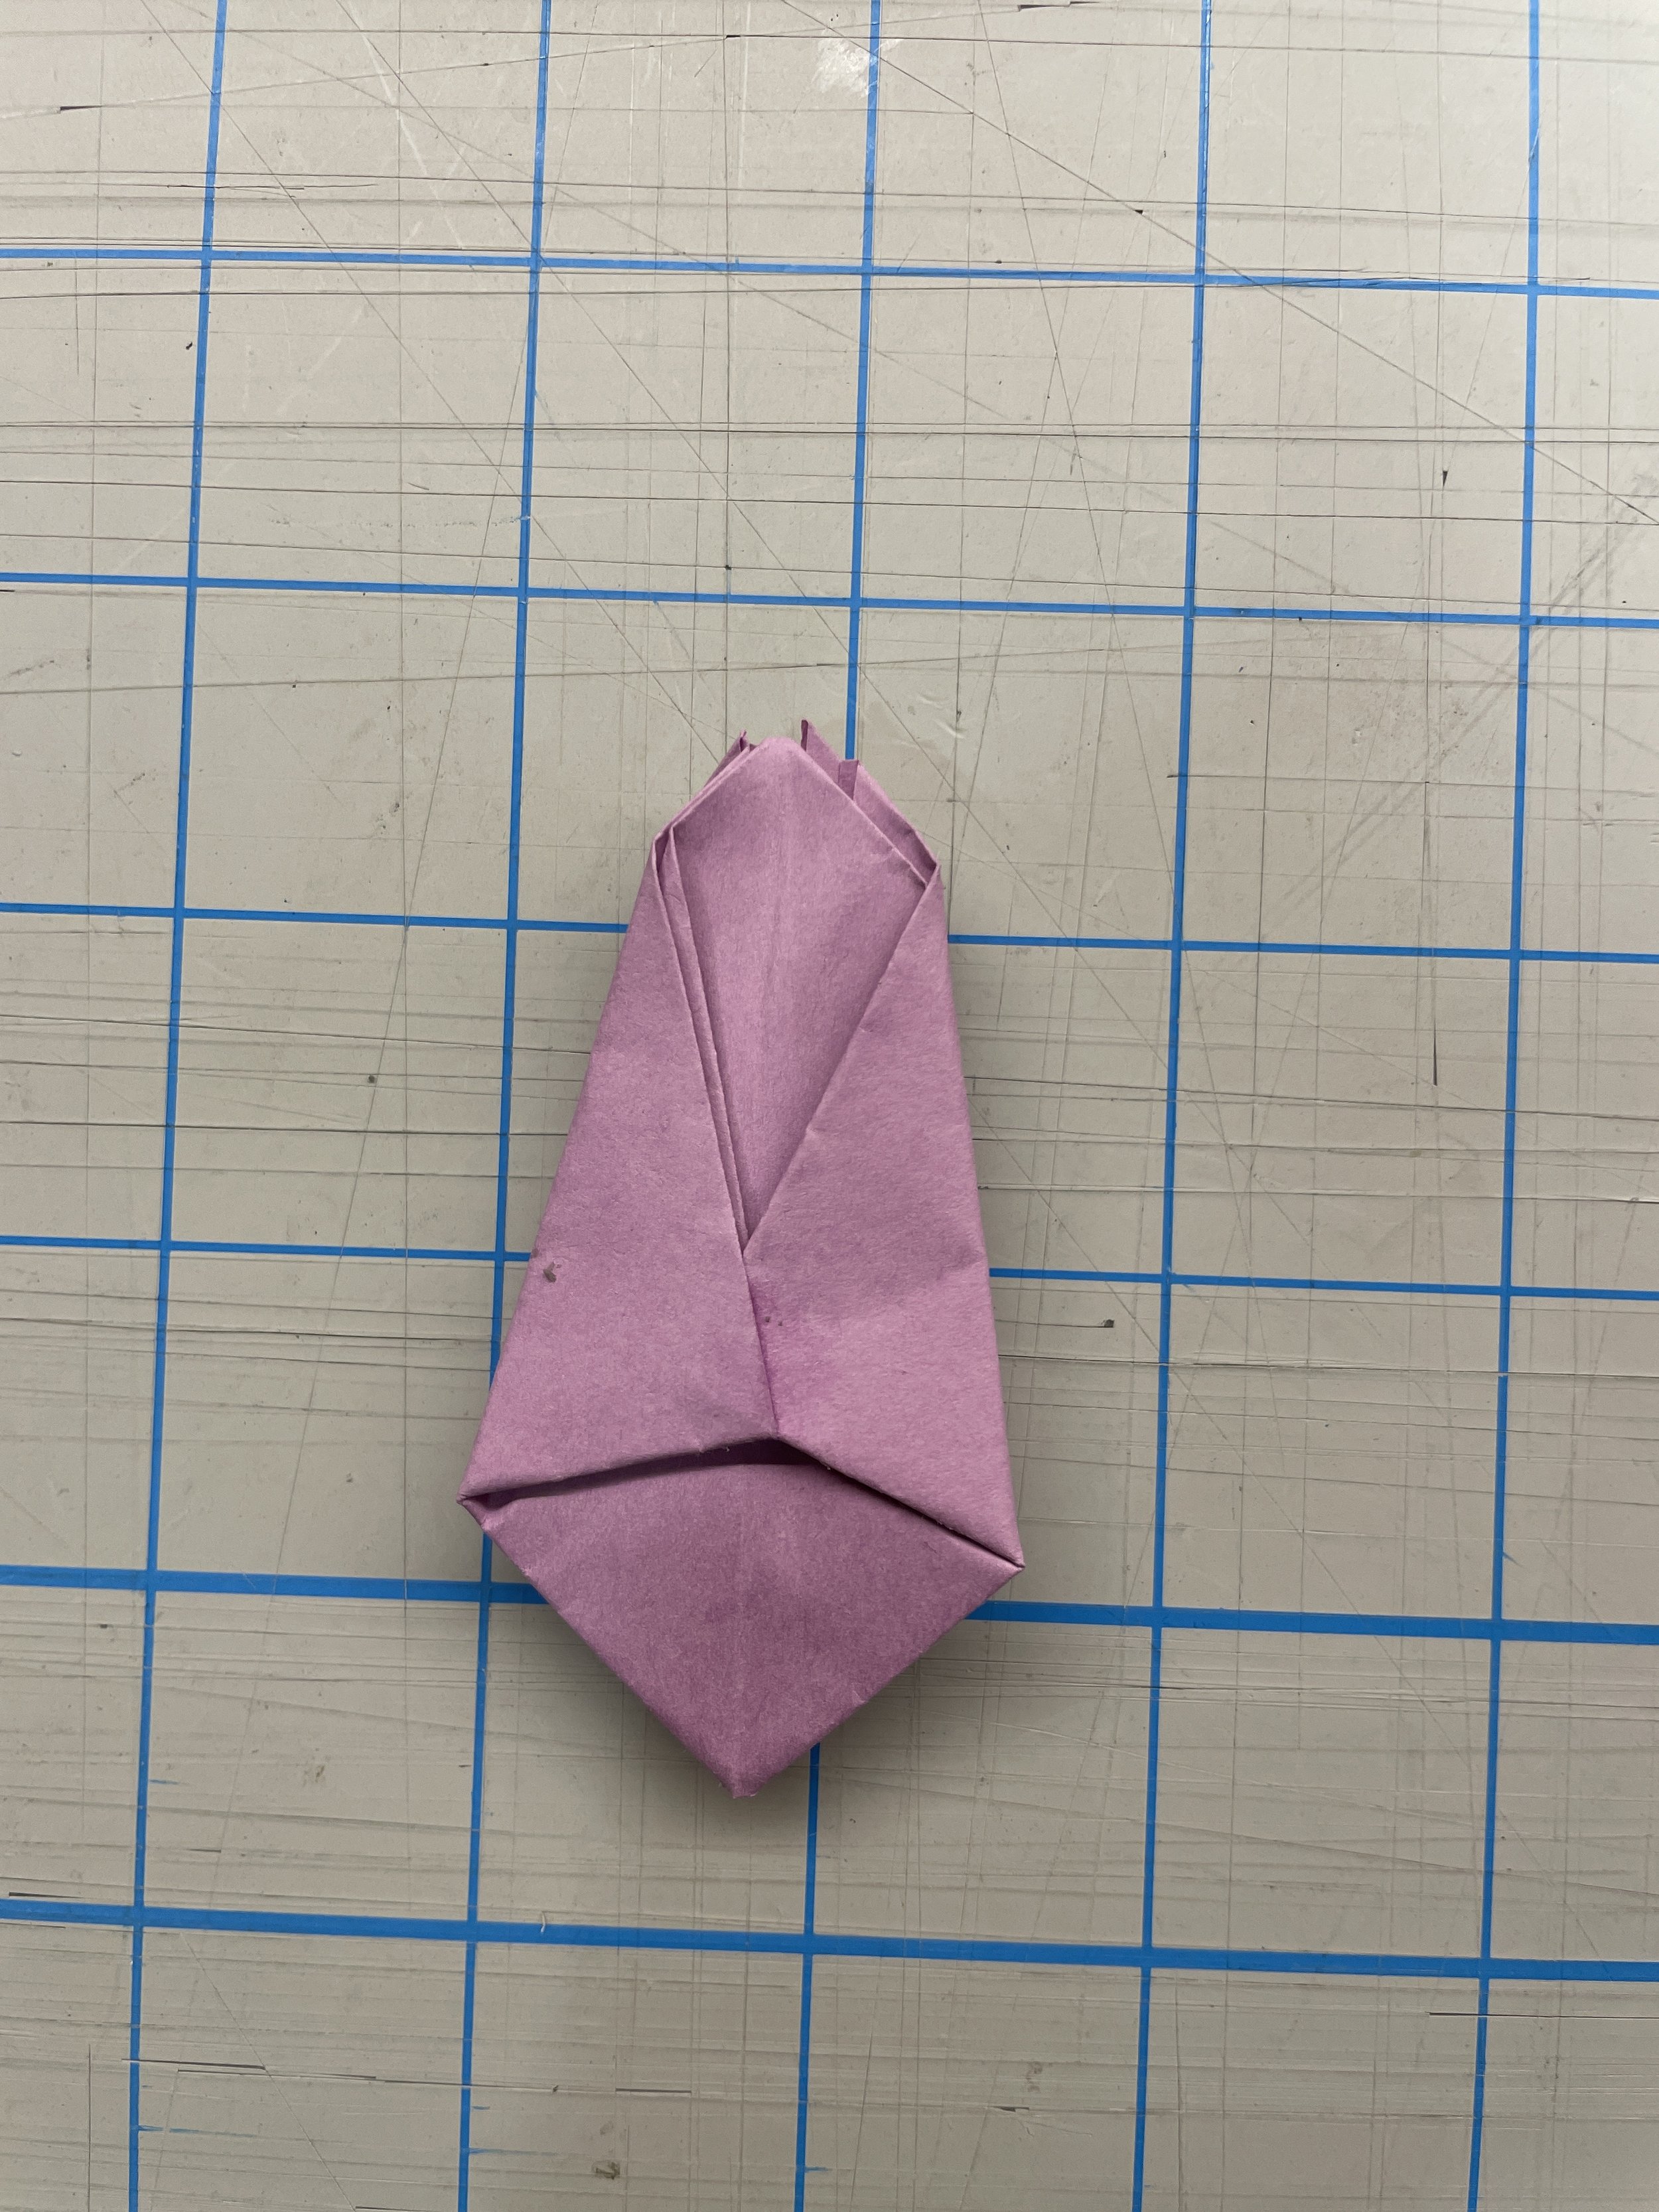
Step 10: Slightly blow into the hole at the bottom of the diamond. The Flower should puff up.
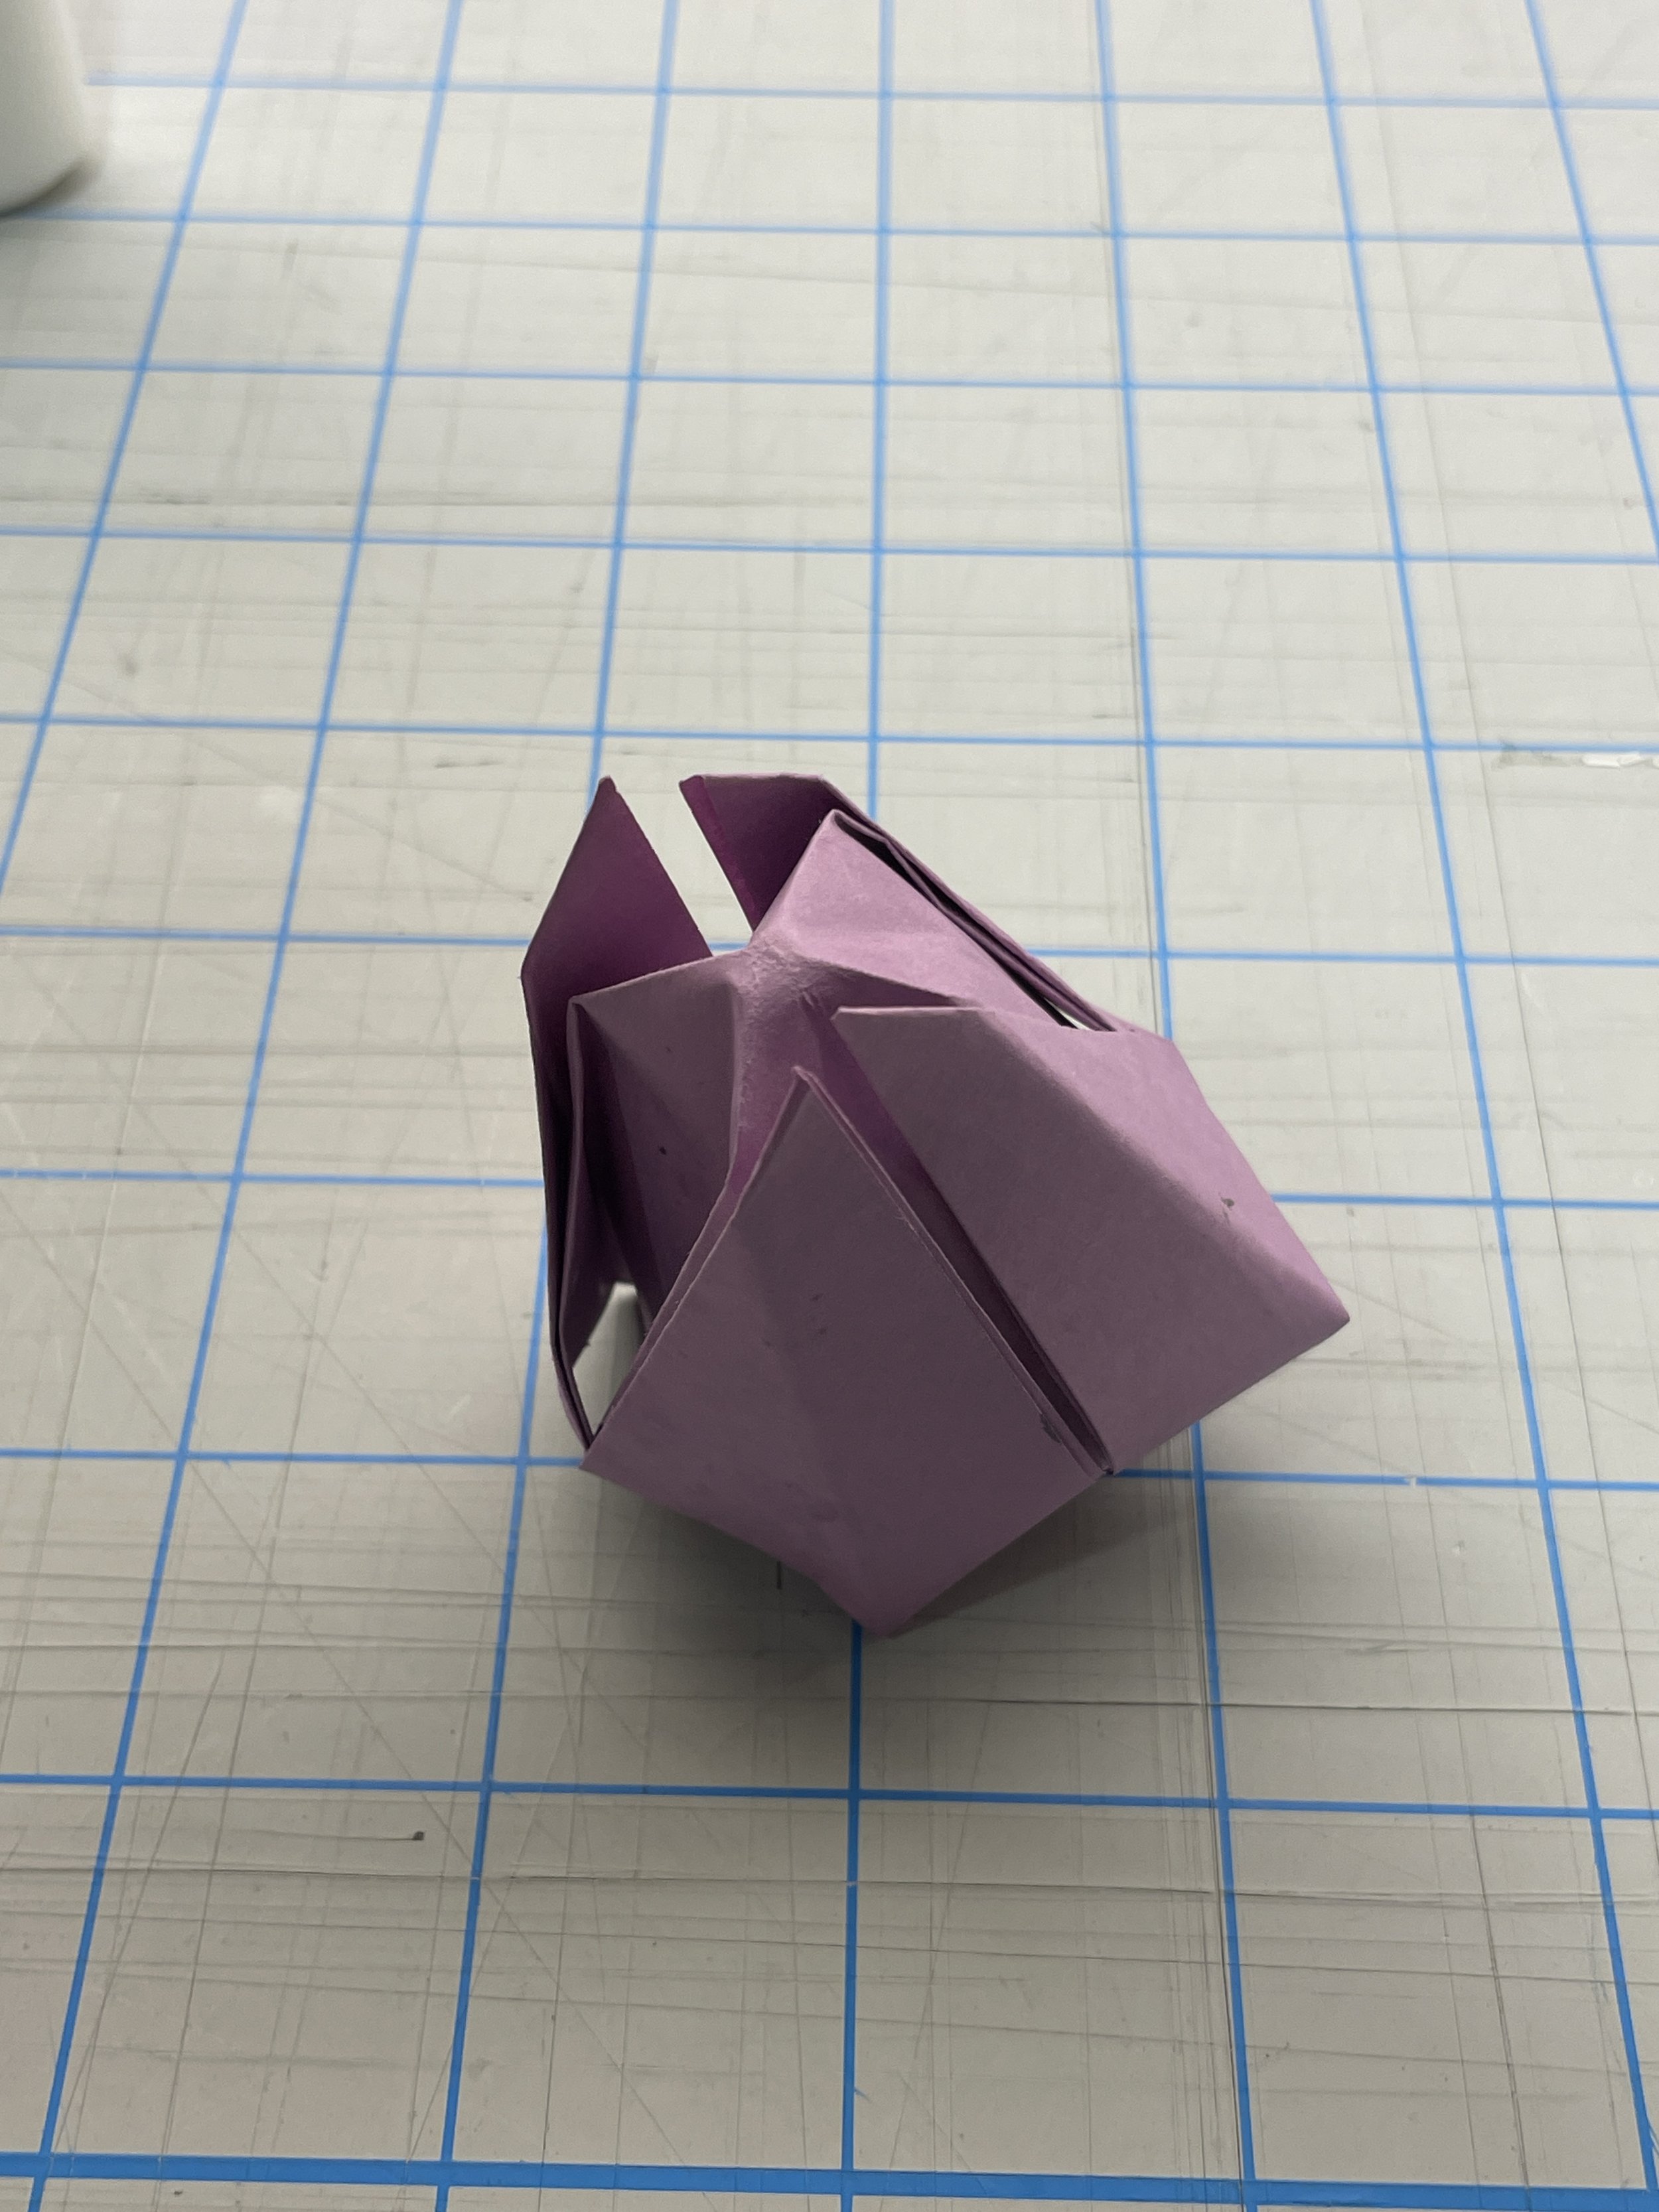
Step 11: Fold the top corners down to form the petals of the flower.

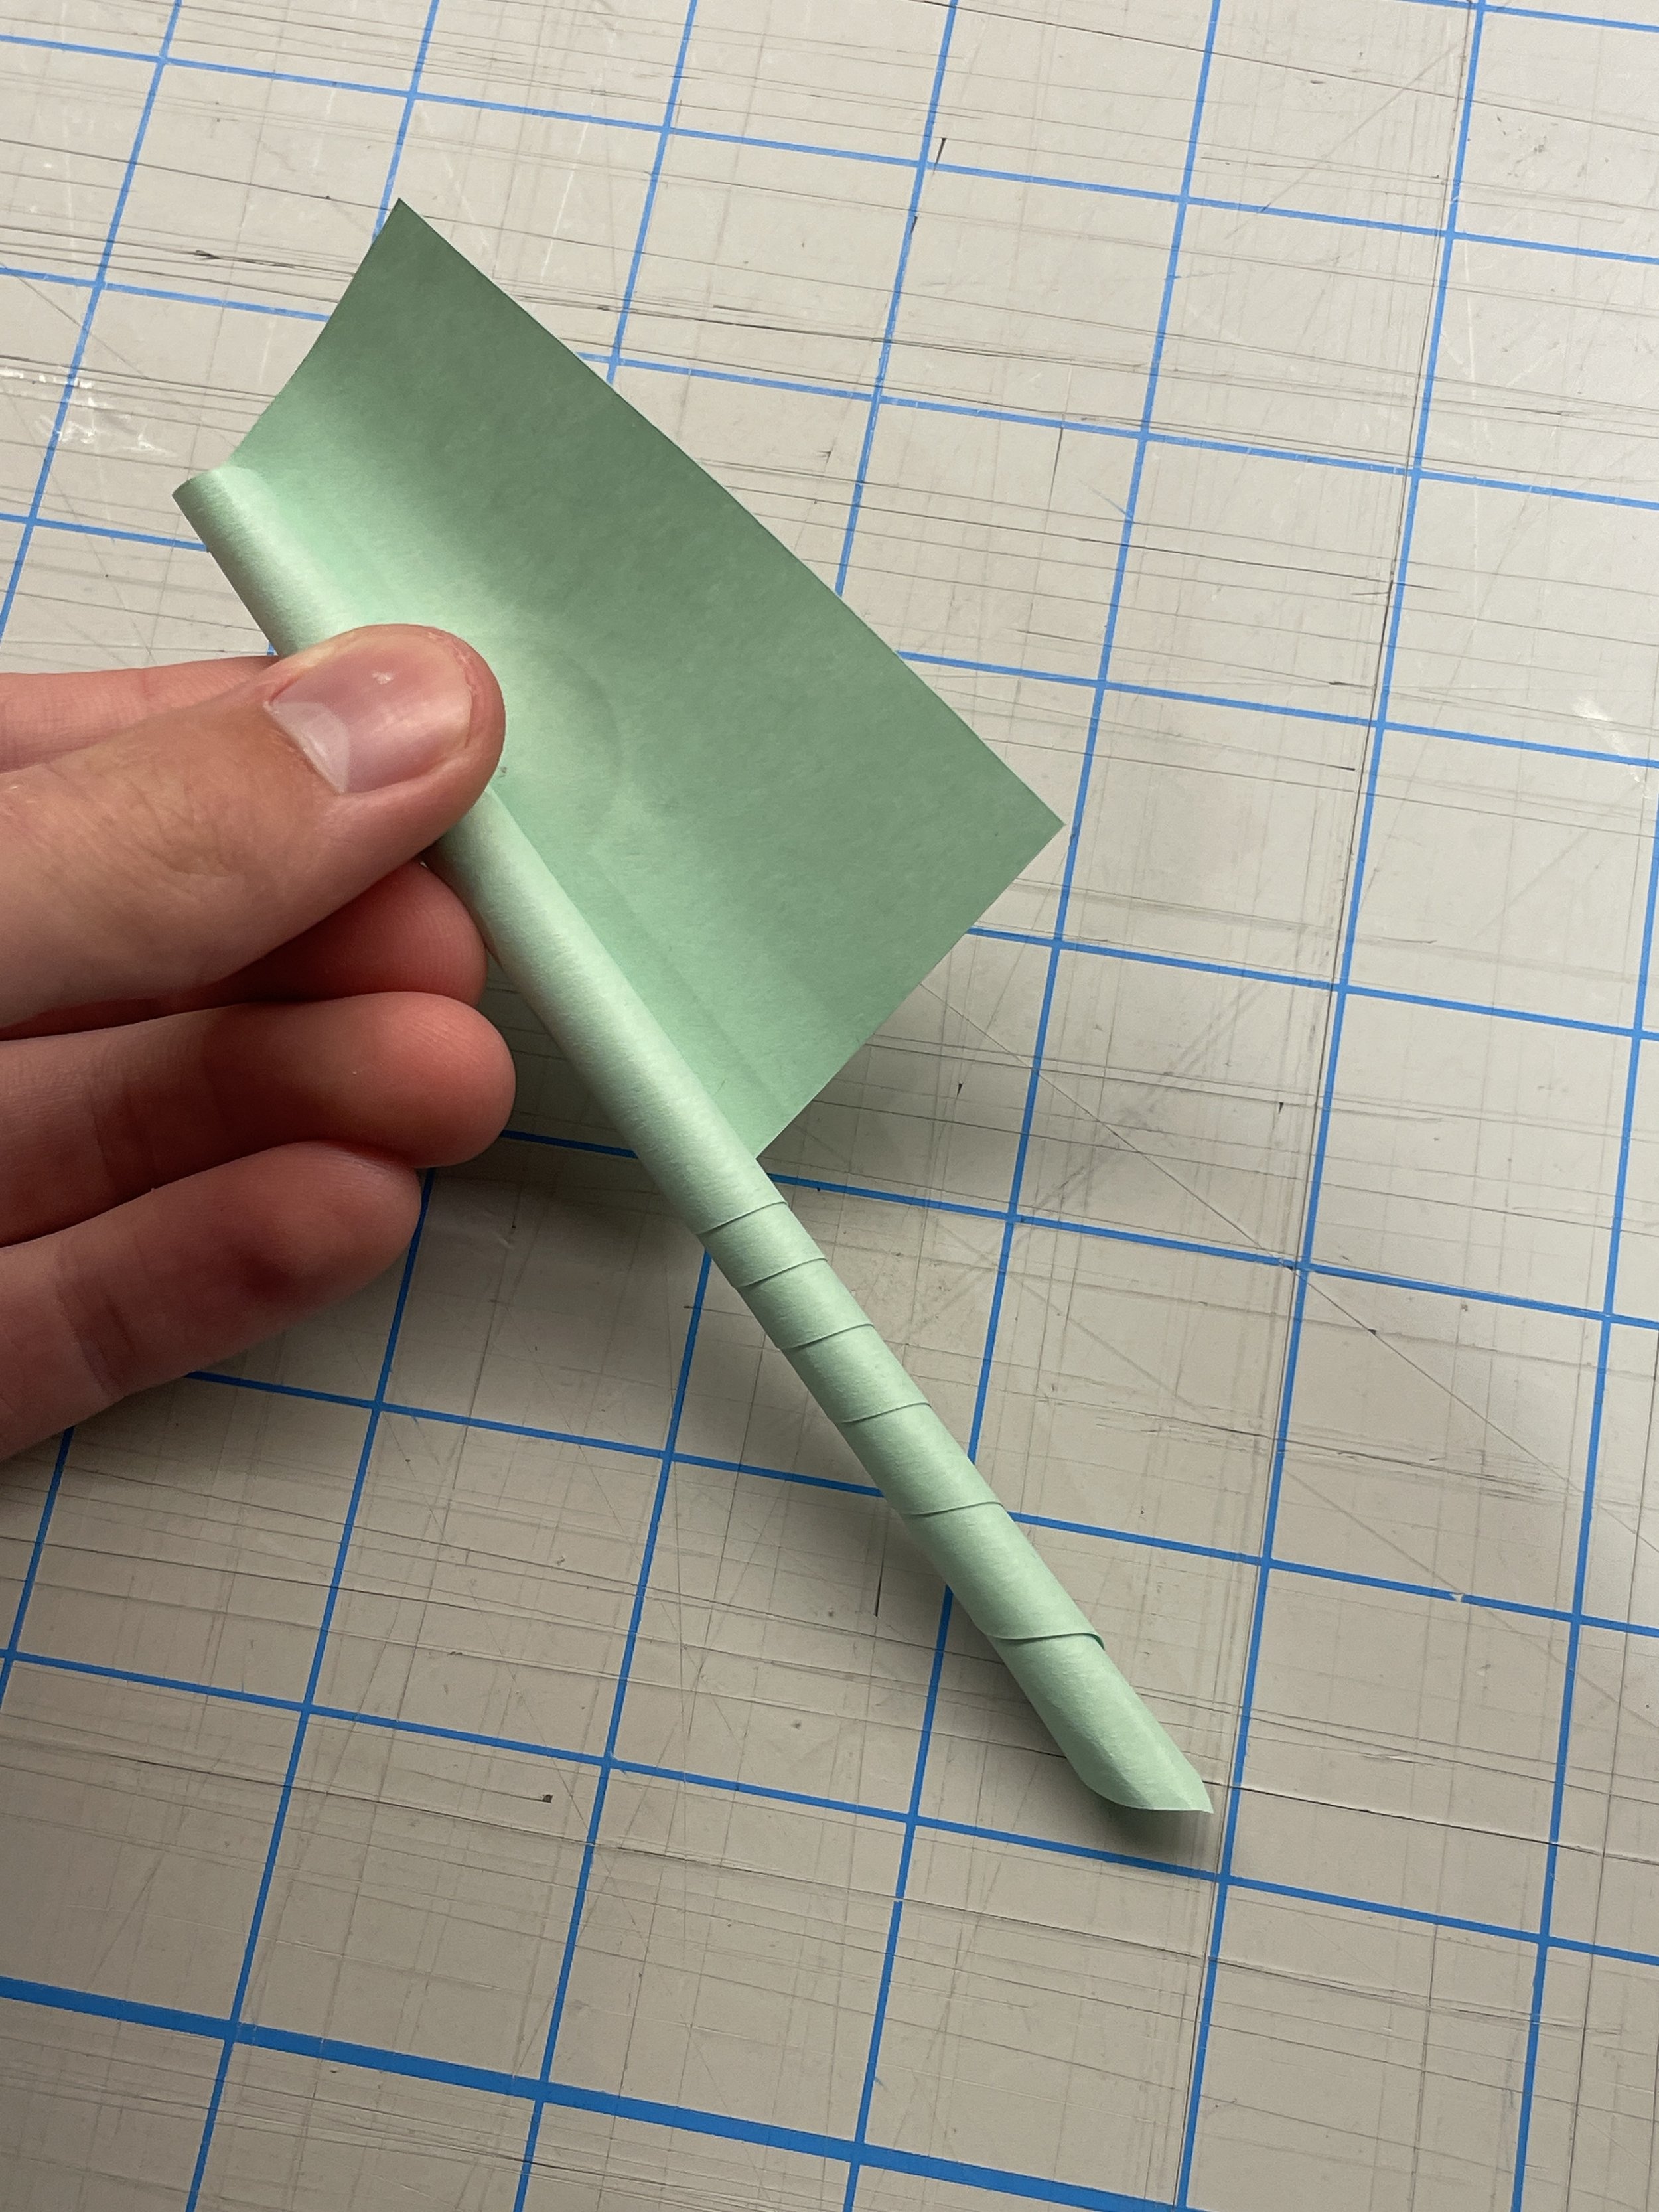
Step 12: Take a green slip of paper no more than 3 inches wide and tightly roll it up to form the stem. Glue the end so it stays tight. And stick it in the hole in the bottom of the flower.
Step 13: Trace and cut leaves out of the green paper you used for the stem and glue them to the stem.

Step 14: Repeat the steps to form a bouquet of flowers!
I hope you enjoyed making the flowers and found it simple. And remember, practice makes perfect. It took me three times to make a flower that I liked!
Be Well, Auburn.
Nathan was born and raised in Pearland, Texas after his parents evacuated New Orleans due to Hurricane Katrina. Except for a few distant cousins, Nathan and his twin brother are the first in their family to attend Auburn, with the entirety of his family being LSU alum. Nathan immediately fell in love with Auburn and began searching for ways to get involved on campus.
Nathan is a freshman majoring in Architecture and plans to minor in Marketing. When he isn’t in the Architecture studio constructing masterpieces till 2 A.M., you can find him running on campus, exploring nature, watching movies in his dorm room, or playing piano, guitar, or marimba.
In the years following graduation, Nathan plans to become a licensed architect and work at a firm in Texas or the Southeast. He hopes to improve low-income housing and create a more walkable city environment.